
At Tynker, we want to make it incredibly easy to get your classroom started! That’s why we support Apple single sign-on for both teachers and students. You can get started quickly with the steps below.
Setup Steps
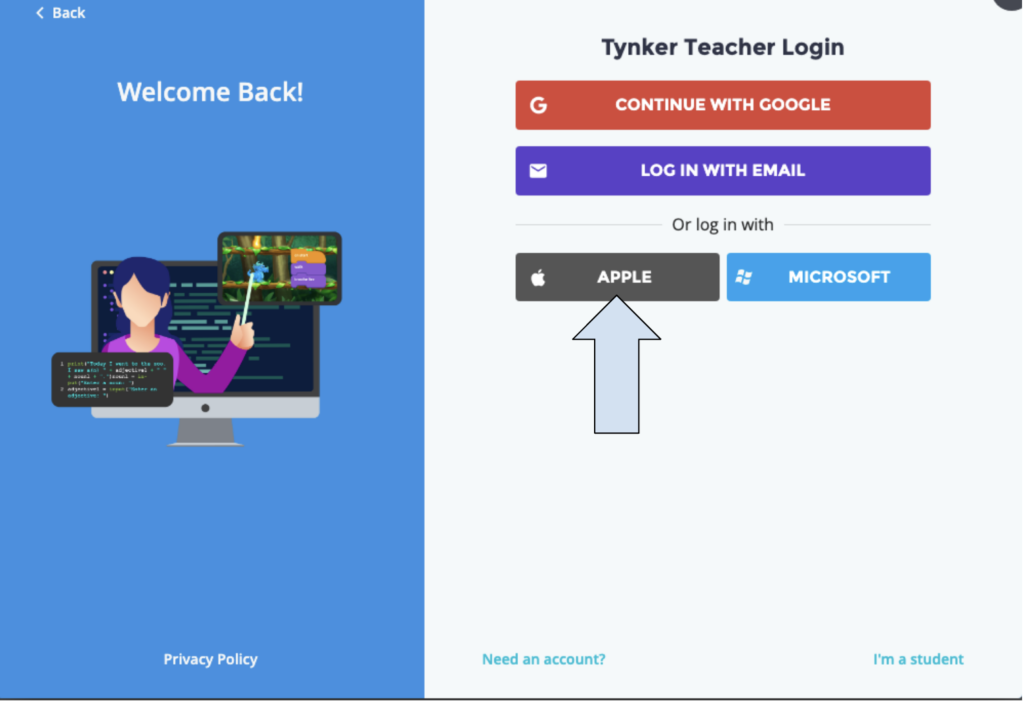
- Log in to Tynker with your Apple district credentials using the Apple single sign-on button.
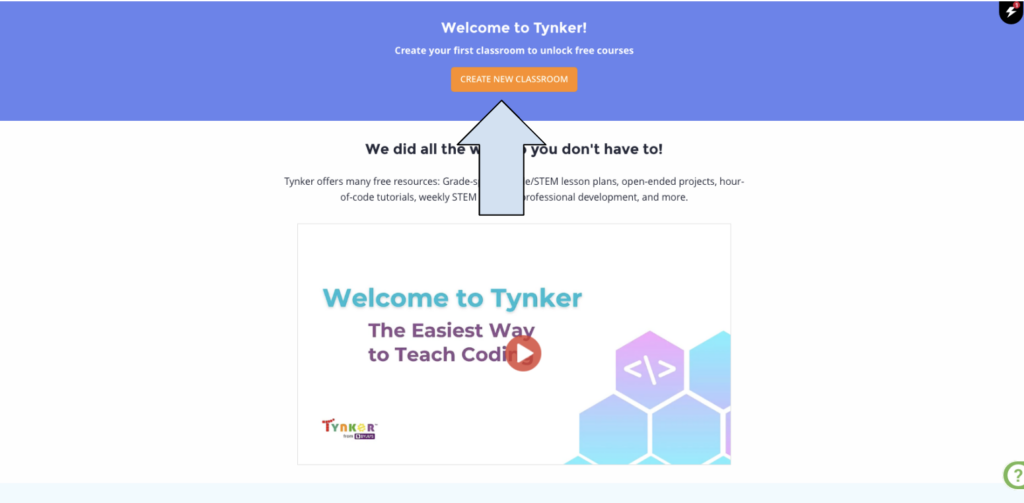
2. Click on the “Create New Classroom” orange button if you don’t have a class or “Add Class” if you already have a class.
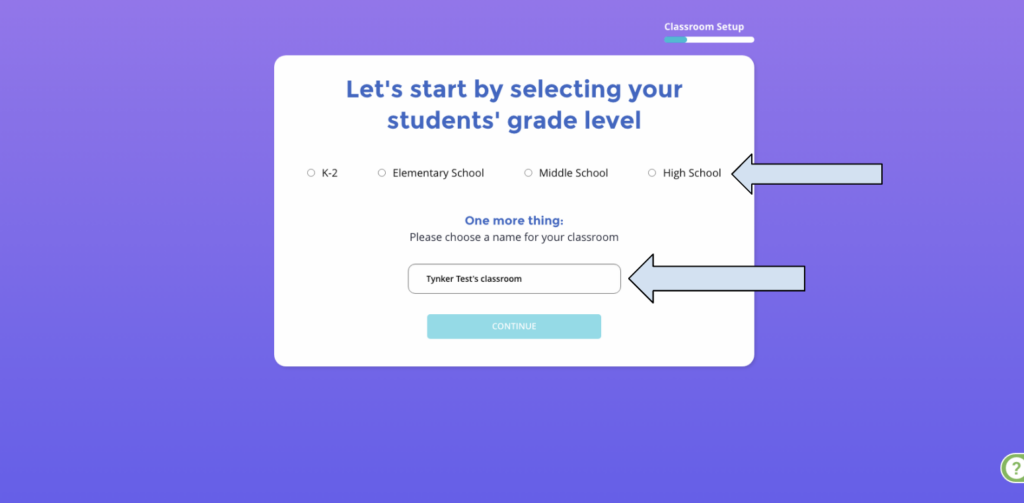
3. Name your class and choose a grade band.
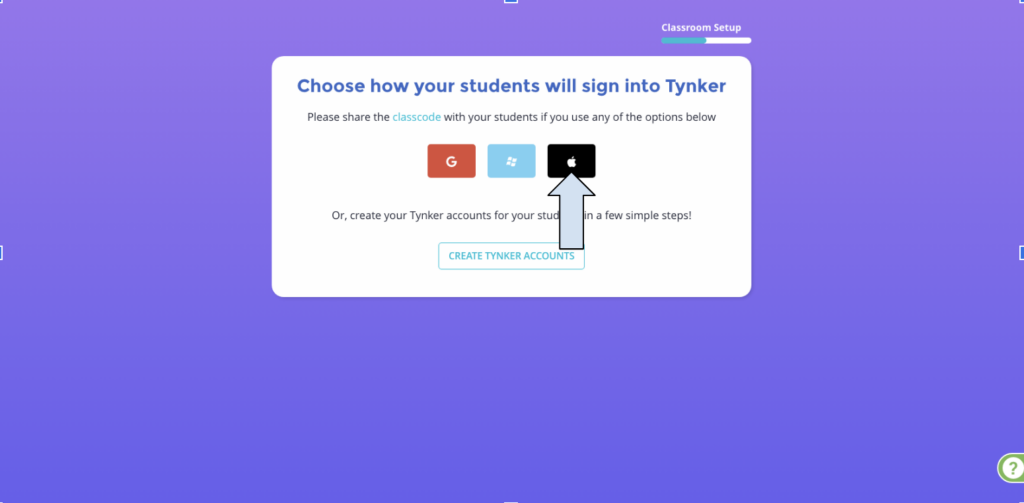
4. Take the class code and give it to students.
5. Students then go to tynker.com, click join for free, and then click class code.
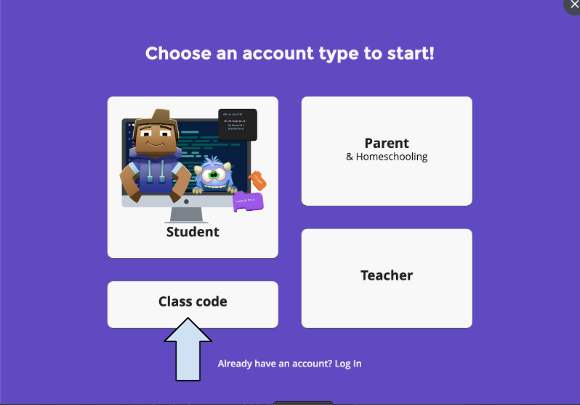
6. Students enter the class code and sign in through their school Apple account to become rostered in the class.
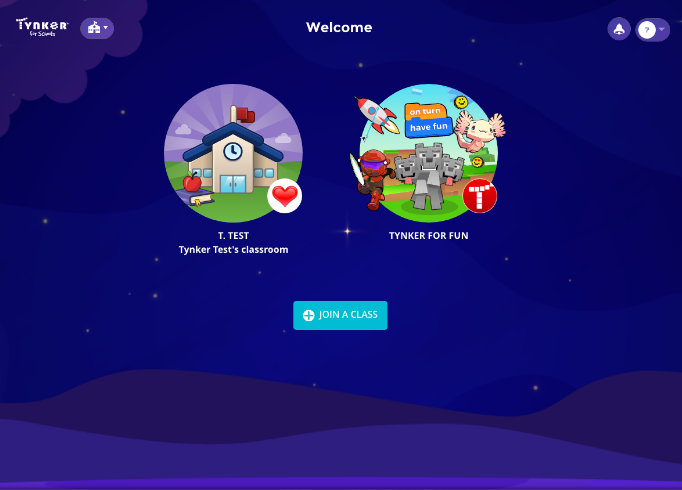
7. Once signed in, students click on their class to get started.
If you need a more detailed walkthrough of Tynker, we recommend our “Getting Started with Tynker” training session. You can find the “Getting Started with Tynker” session and a host of others that include coding principles, coding in core curriculum classes, topics of interest like AI, and topics for specific groups like AP computer science teachers through the button below.
If you have any other questions about our Apple integration or Tynker in general, message us at educatorsupport@tynker.com.



![[Webinar Series] Code with Google and Tynker in Three Amazing Webinars!](https://images.tynker.com/blog/wp-content/uploads/20191029135731/Webinar-series-banner.001.jpeg)